Ask which is "stronger" 0.05 M HCl(aq) or 0.10 M citric acid? Test each solution using a conductivity test. Even though the concentration of citric acid is twice the concentration of HCl, the citric acid solution lights up the light bulb dimly. The 0.05 M HCl solution lights up the light bulb brightly.
Curriculum Notes
Citric acid solution partially dissociates, meaning that only a few H+ and C6H5O73- ions are present in solution. Citric acid stays mostly together as H3C6H5O7 molecules in aqueous solution. Citric acid solution is a weak acid and is classified as a weak electrolyte.
The HCl solution dissociates 100% in water, meaning that all of the HCl reacts with water to form H3O+ ions and Cl- ions. A HCl solution is a strong acid and is classified as a strong electrolyte.
The concentration of an acid solution has NOTHING to do with the classification of a solution as a “strong acid” or “weak acid”.
Authors: Randy Sullivan and Tom Greenbowe, University of Oregon This page is under construction.
Simple conductivity apparatus diagram with a 1.5 volt battery, direct currect
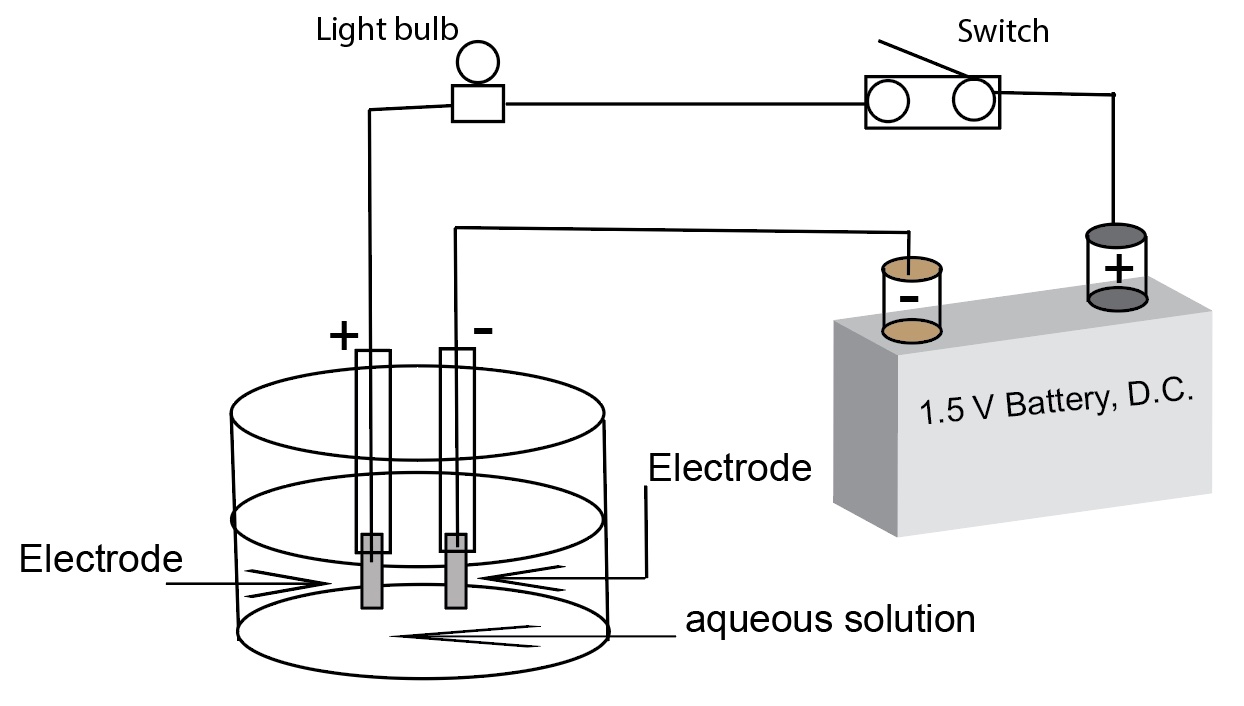
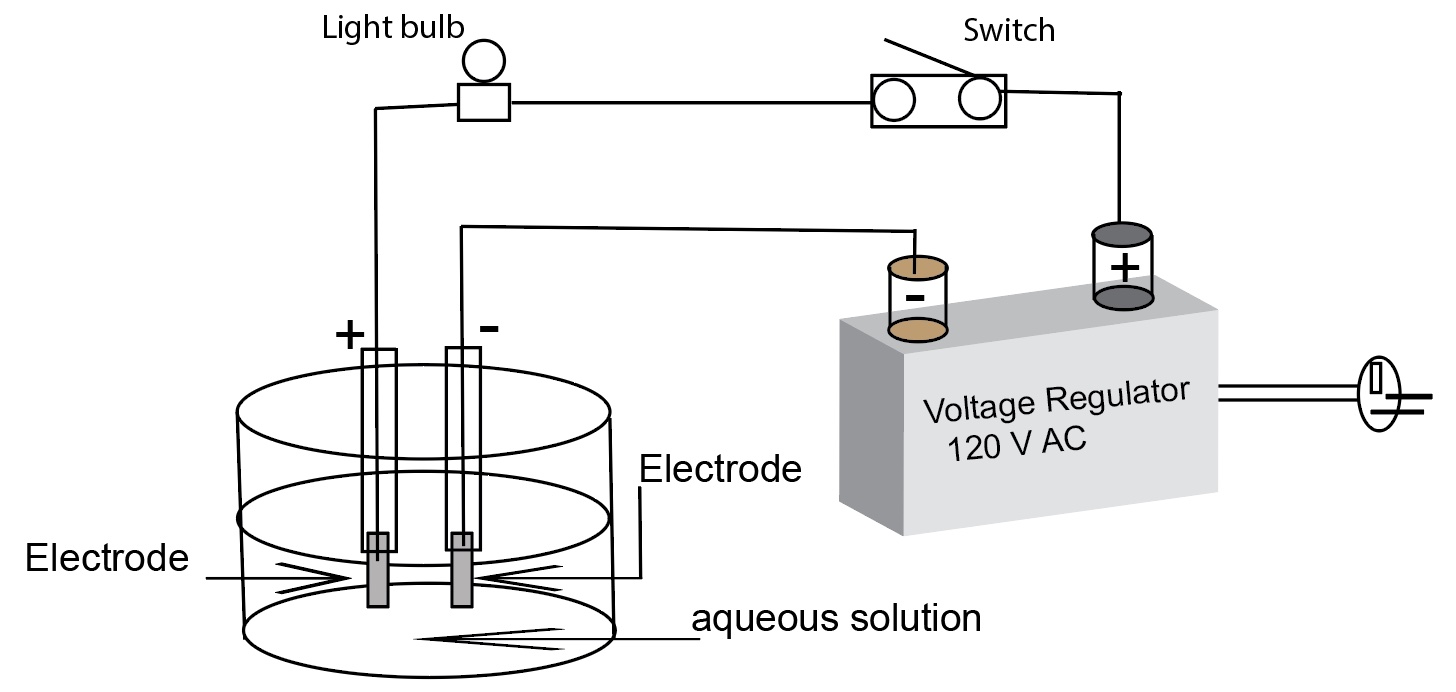
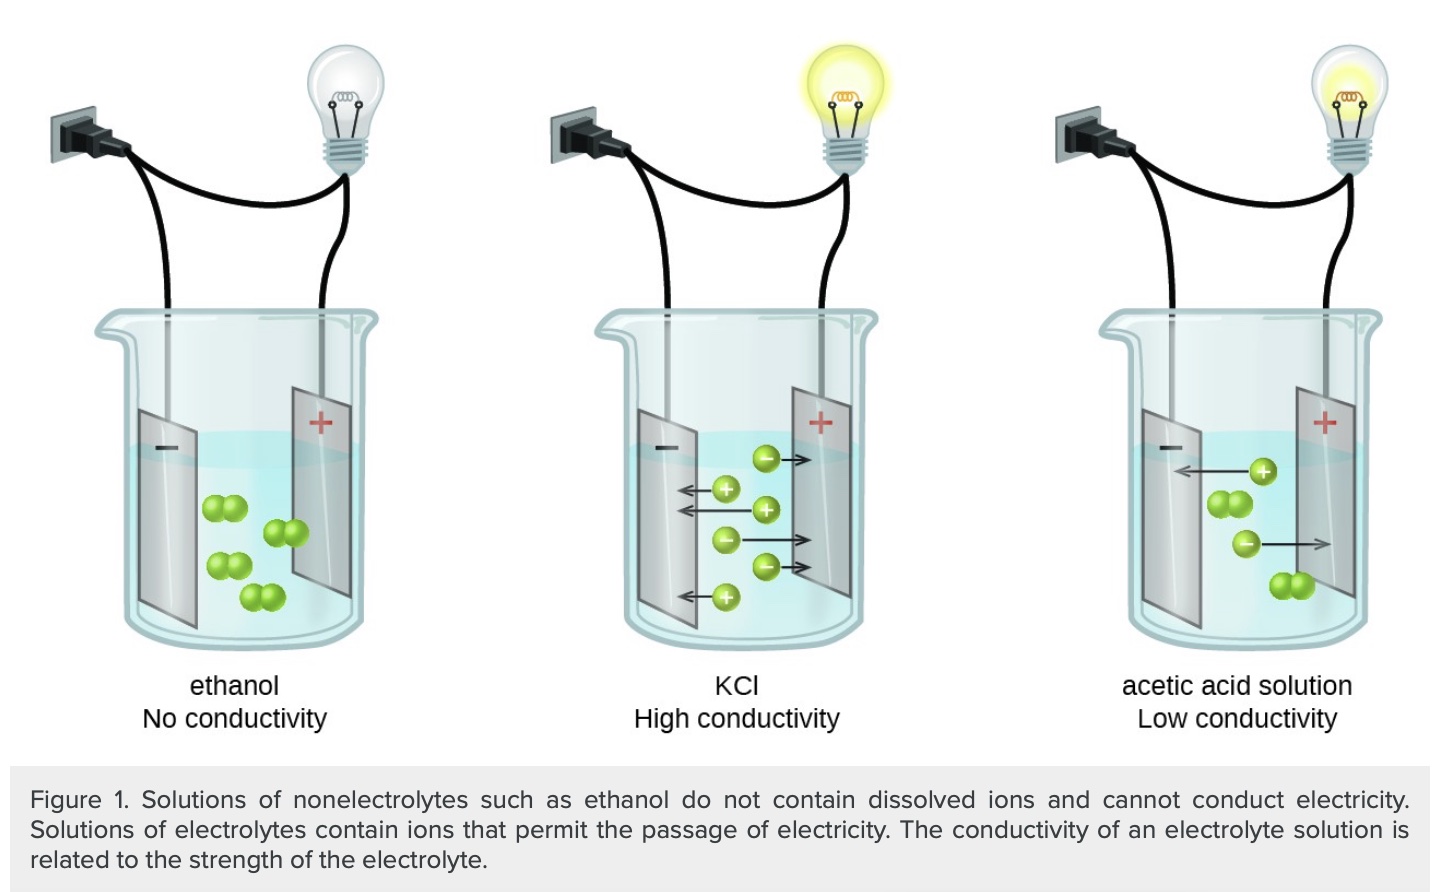
Two wires connected to a battery are lowered into an aqueous solution. A light bulb serves as an indicator. A brightly lit bulb indicates a solution containing lots of ions, i.e. a strong electrolyte. A dimly lit light bulb indicates a solution containiing some ions, i.e. a weak electrolyte. When the bulb is not lit, it indicates a solution with very few ions, i.e. a non-electrolyte. For a disscusion of the workings of conductivity apparatus please see the separate file posted on this web site.
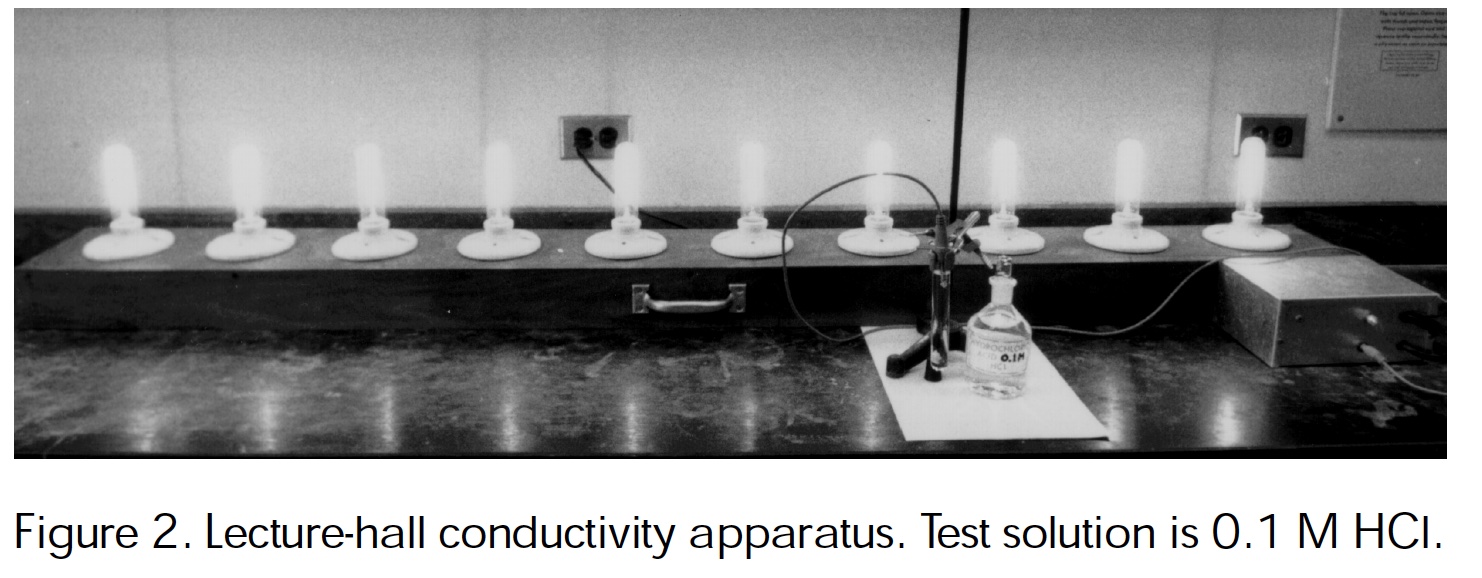
Lecture hall conductivity apparatus with ten light bulbs. Haworth, Bartlet, Kenney (1999) Solution Conductivity Apparatus. J. Chem Ed.
Conductivity apparatus safety comments and cautions when using the simple apparatus connected to 120 Volts AC outlet
The person doing the demonstration (instructor or demonstrator) needs to wear a pair of rubber gloves before plugging the conductivity
apparatus electrical cord into an AC electrical outlet. The gloves are kept on through out the entire experiment and while the apparatus is plugged in. The instructor or demonstrator shall wear safety googles.
To prevent electric shock, the electrodes are not to be touched while the apparatus is plugged into a 120 volts AC outlet. The apparatus is not to be left on unattended. In any demonstration involving “live” electrical contacts, the apparatus must be disconnected from the power source except when actually doing the demonstration and making observations.
Conductivity Apparatus Notes
A good conductivity apparatus is necessary for this demonstration, one that indicates more than not lit, dimly lit, and brightly lit bulb. Students grasp several concepts when the conductivity apparatus is illustrated as having a direct current battery with a positve pole and a negative pole. Students readily argee the positive cations in solution will be attracted to the negative electrode and the negative anions will be attracted to the positive electrode. However, there are problems with polarization about the electrodes within a few seconds of operation. Most simple conductivity testers , using bare wires, are plugged directly into a 120 volt AC outlet. This is a safety hazzard. the Journal of Chemical Education has published several articles about homemade conductivity testers, complete with materials and circuit diagrams. All of theses provide some degree of qualitative indications (bar graphs, multiple lights) that goes beyond bright and dim and not lit categories
Materials
- 200 mL of 0.10 M citric acid
- 500 mL of deionized water
- 200 mL of 0.05 M hydrochloric acid
- 3 400 mL beakers
- 2 stirring rods
- conductivity tester mounted on ring stand
- power strip
- wash bottle containing deionized water for rinsing electrodes
- large crystallization dish to catch rinse water
- screwdriver with insulated handle
- paper towels
Procedure
- Plug in power strip to electric outlet and plug in conductivity tester to power strip. Make sure that the power strip is turned off!
- Turn on the power strip. Short the electrodes with the blade of the screwdriver to show the students what a positive conductivity result looks like. The bulb lights up. Turn off the power strip.
- Pour about 200 mL of deionized water into one of the 400 mL beakers. Turn on the power strip and insert the electrodes into the water. The bulb does not light. Turn off the power strip.
- Pour about 200 mL of 0.10 M citric acid into the remaining 400 mL beaker. Turn on the power strip and insert the electrodes into the acetic acid solution. The bulb glows dimly. Turn off the power strip.
- Pour about 200 mL of 0.05 M hydrochloric acid into the remaining 400 mL beaker. Turn on the power strip and insert the electrodes into the HCl solution. The bulb glows brightly. Turn off the power strip.
Chemistry Connections
Image from a particle level animation of cations and anions in aqueous solution in a conductivity test, migrating in opposite directions - water molecules and electrodes are not shown.
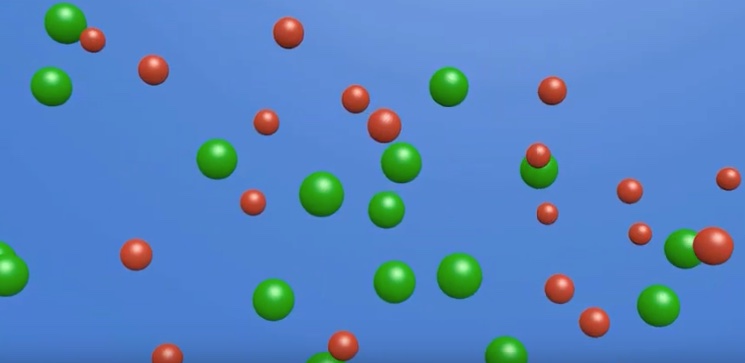
The animation link is included below.
Learning Objectives
1. Explain why water is a polar molecule and how five or six water molecules interact with substances to participate in the dissolving process.
2. From physics, apply the concepts of "unlike charges attract", dipole moment, and vectors to help explain why polar substances and soluble ionic substances dissolve in water to generate ions.
3. Categorize an aqueous solution as being a strong electrolyte, weak electrolyte, or non-electrolyte, based on the results of a conductivity test.
4. Represent aqueous ionic solutions and aqueous polar covalent solutions (strong electrolytes, weak electrolytes, and non-electrolytes) using particle level diagrams.
5. Relate the results of a conductivity test to the relative number of ions in solution.
6. For an aqueous solution undergoing a conductivity test, explain how the movement of cations and anions in opposite direction in a solution, constitutes a electrical current.
7. For an aqueous solution undergoing a conductivity test, explain why cations move toward the negative electrode and why anions move toward the positive electrode.
8. Categorize an aqueous solution as a strong electrolyte, weak electrolyte, and non-electrolyte solutions, based on the results of a conductivity test.
9. Clearly illustrate and explain the distinctions among strong electrolyte, weak electrolyte, and non-electrolyte solutions.
10. Identify weak acids, strong acids, weak bases, and strong bases based on chemical structure (Lewis structure, name of compound).
11. During a conductivity test of an aqueous solution, explain why electrons do not move through an aqueous solution.
References
Haworth, D., Bartlet, M. Kenney, M. (1999). Solution Conductivity Apparatus. J. Chem. Ed. 76(5), 625.
